|
StormPursuit
Forecast Tools:
Pictures/Accounts:
Education:
The Rest:
|
|
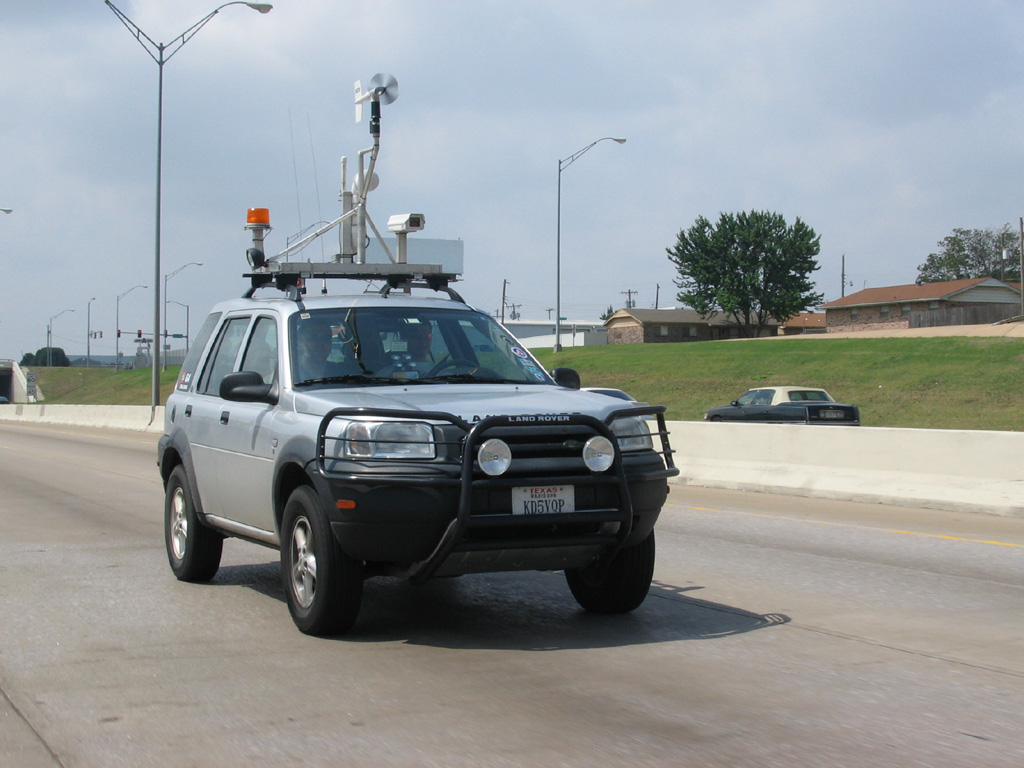
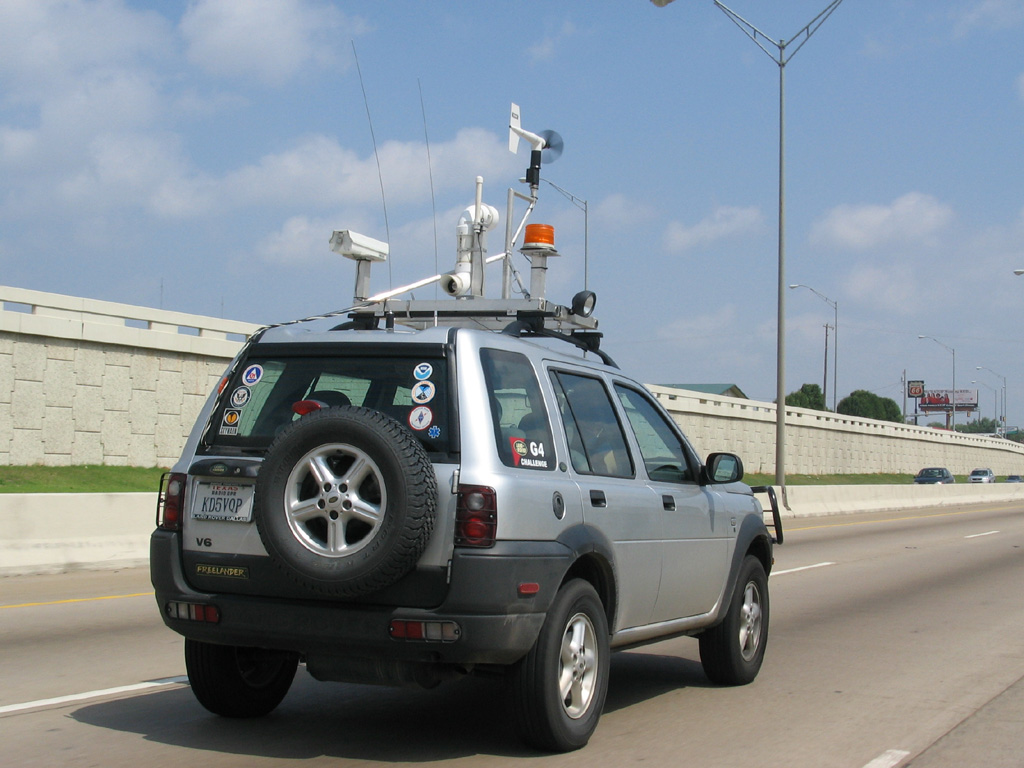
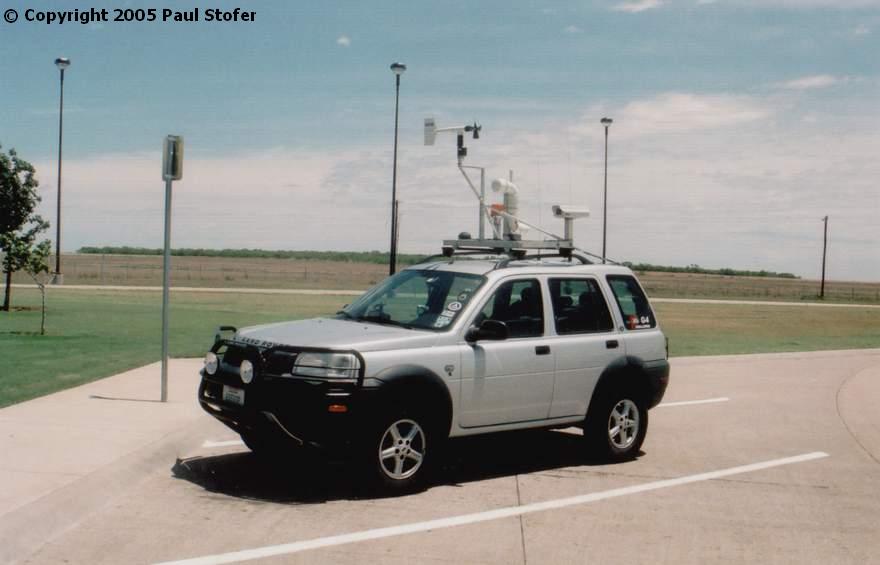
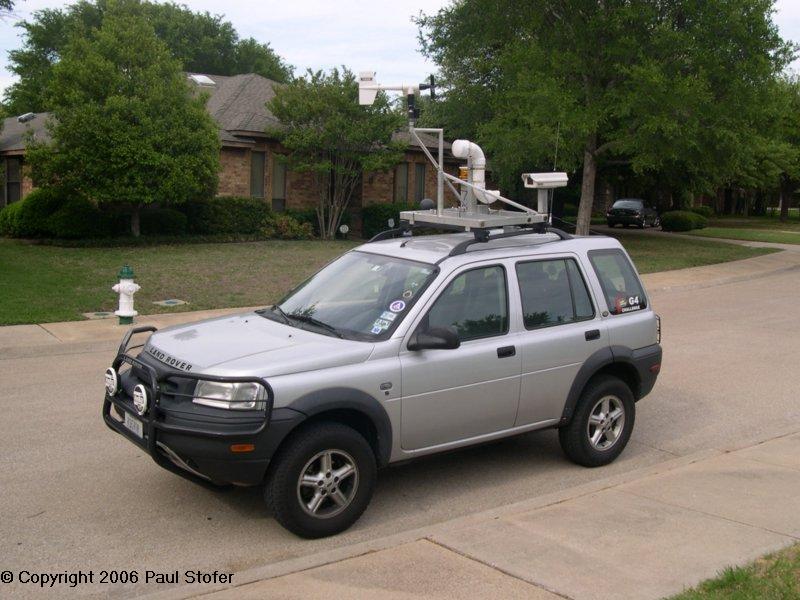
Land Rover Storm Chasing Vehicle
THIS VEHICLE IS NO LONGER MY CURRENT
CHASE VEHICLE.
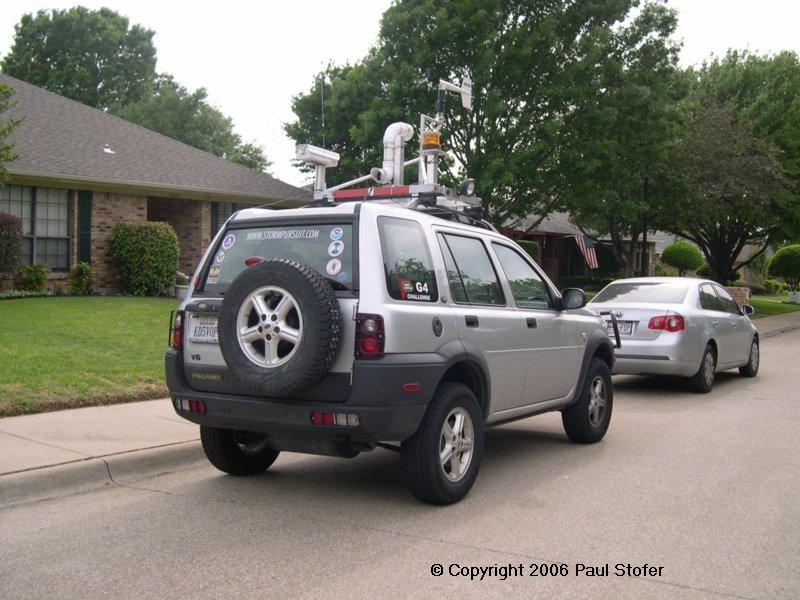
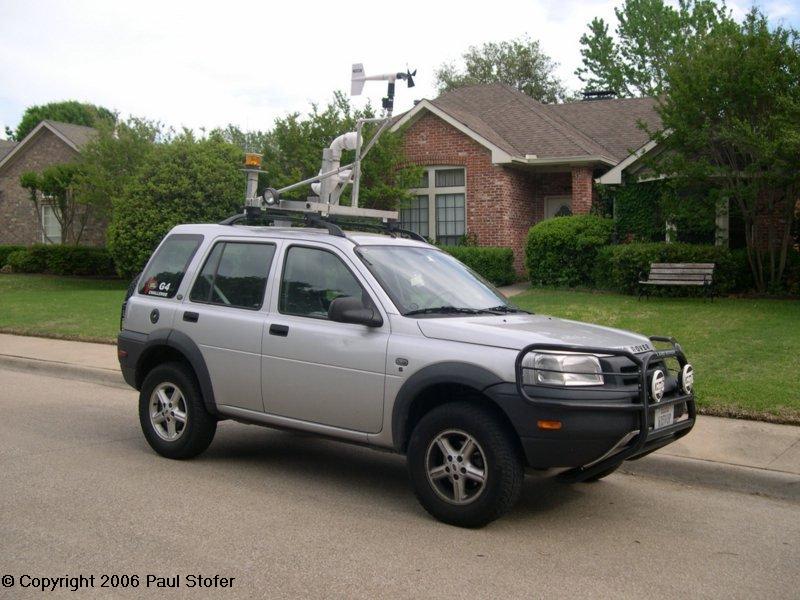
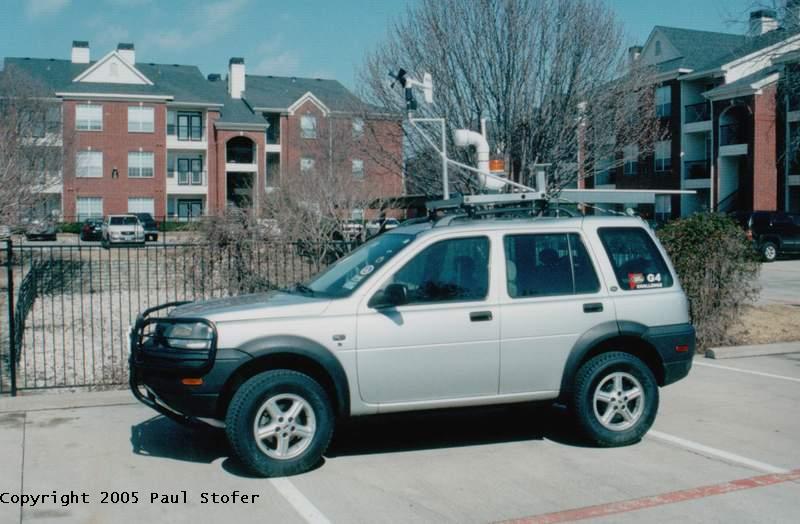
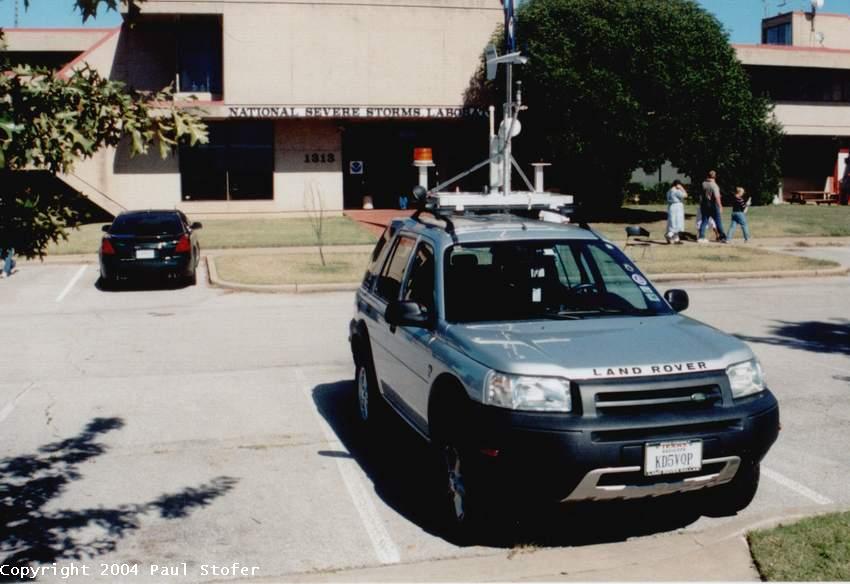
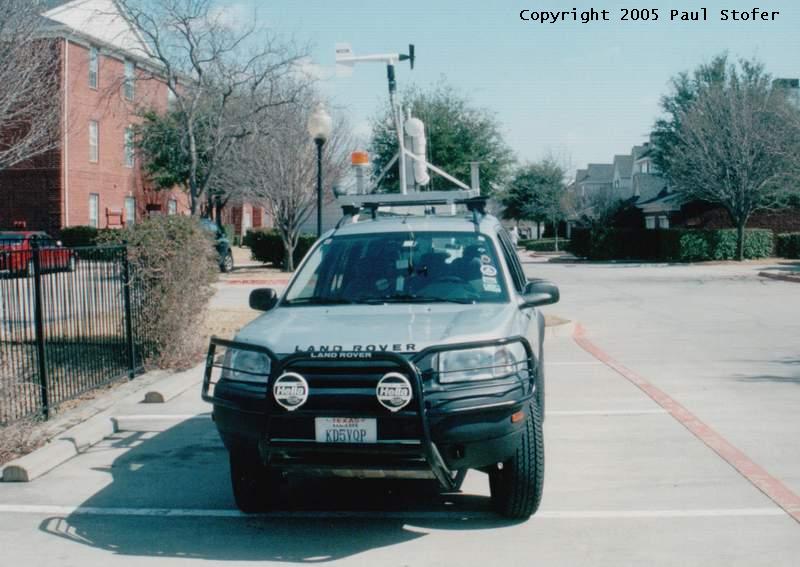
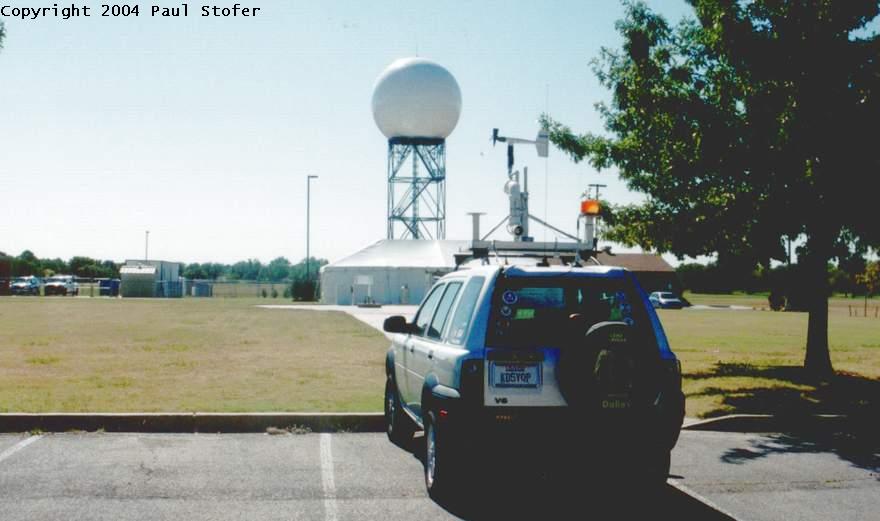
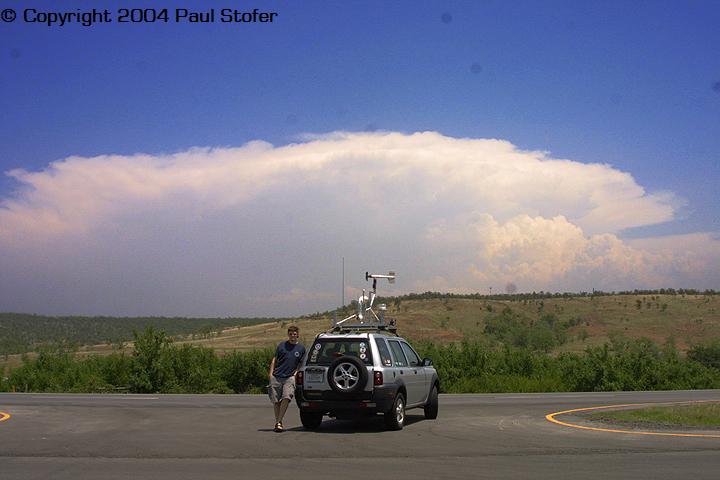
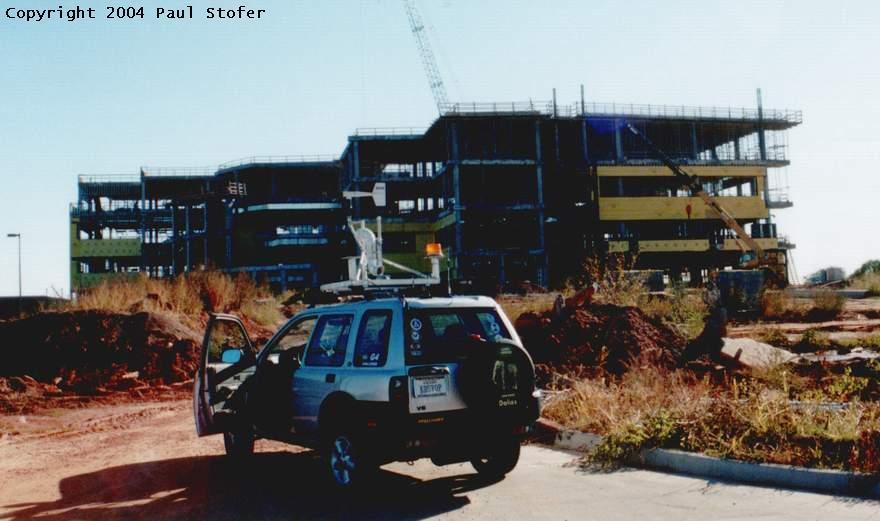
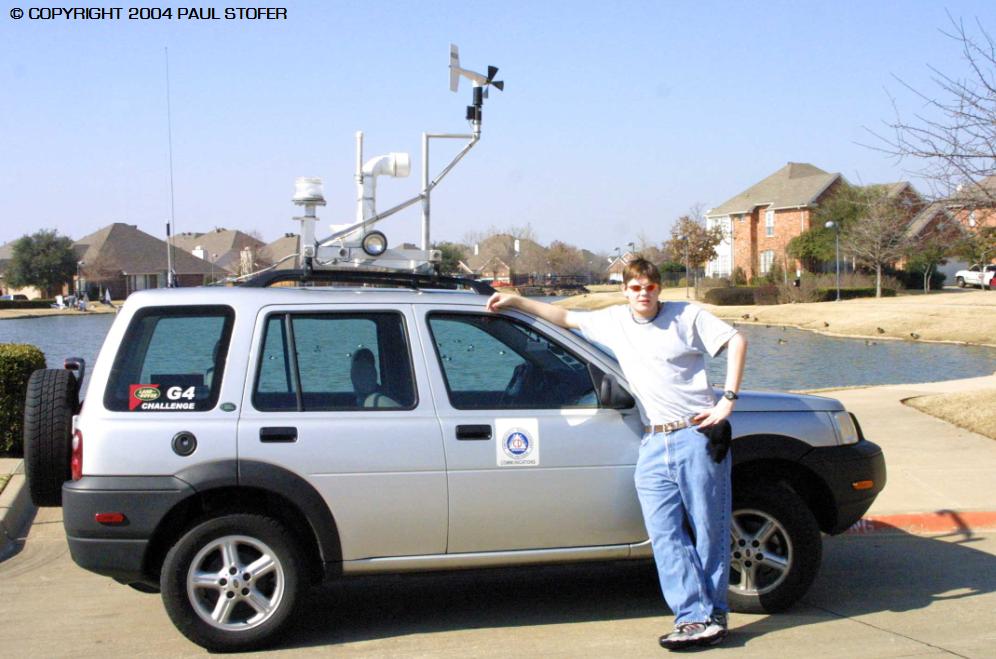
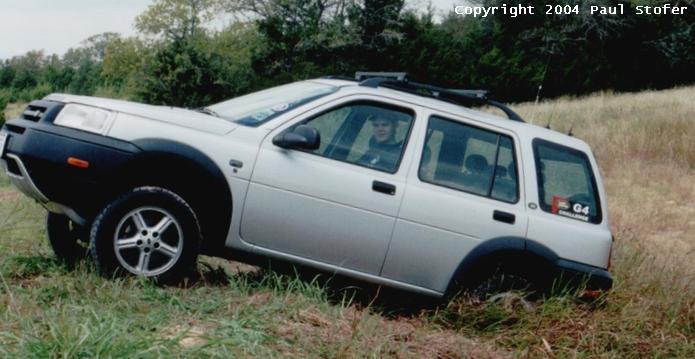
My storm chasing vehicle
from 2004-2007 was a silver Land Rover Freelander.
The performance of this vehicle is unbelievable both on the road and
off. Some of the features are Automatic Decent Control for very steep
hills and serious off-road events, All-Wheel Drive, VERY low center of
gravity, and many other features! Other than the small trunk space, the
cab has a large dash and plenty of passenger room! I added larger
AT Tires and much more which you can read about below. Along with
tornado chasing, I hope and intend to do some hurricane observing in the
Florida Panhandle as well as doing a lot of
off-roading!
On this page you will find a
list and pictures of the work that I have done to the Rover. You can
find other publications about my Freelander by going to
Freelanderliving.com!
PROJECTS COMPLETED
|
|
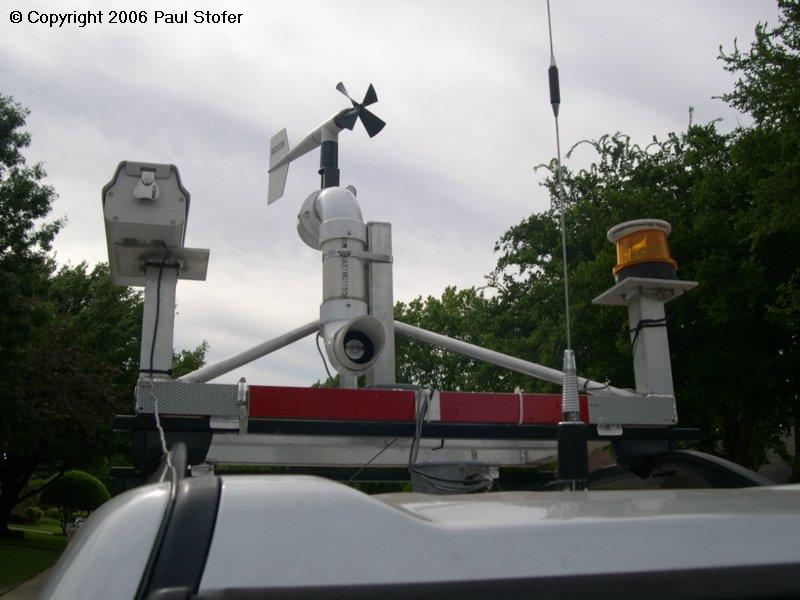
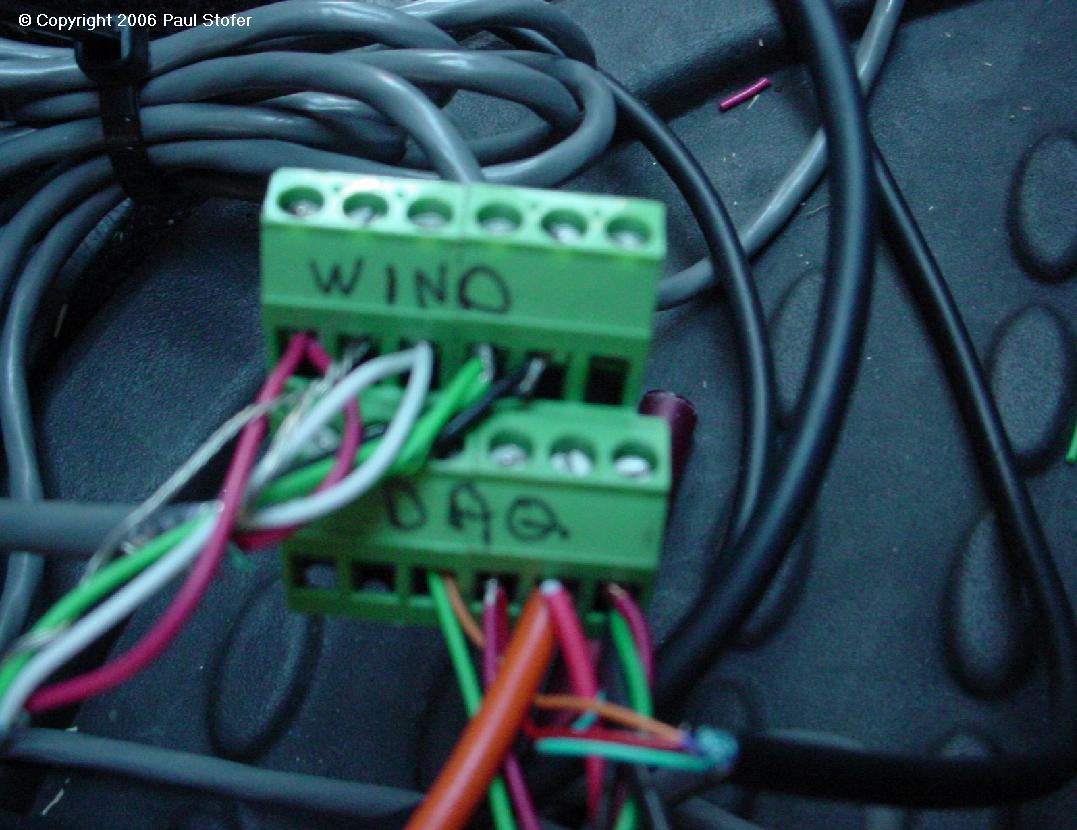
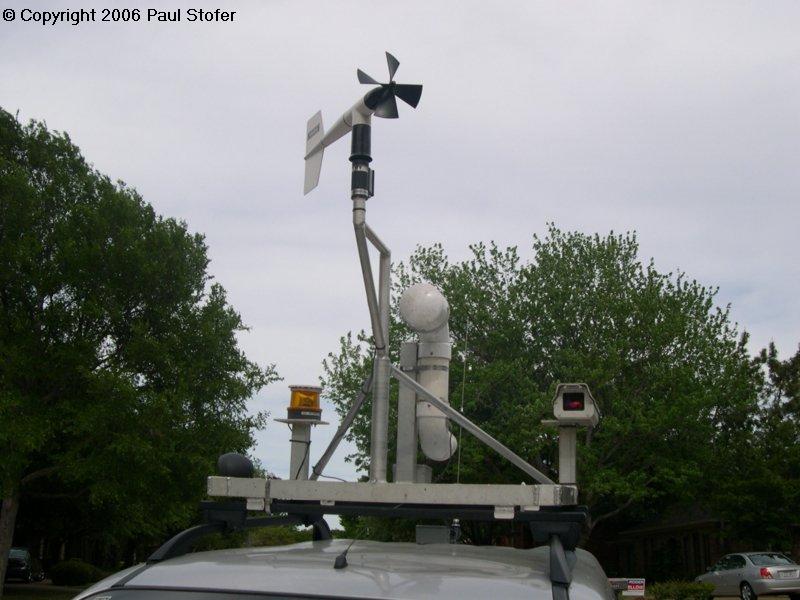
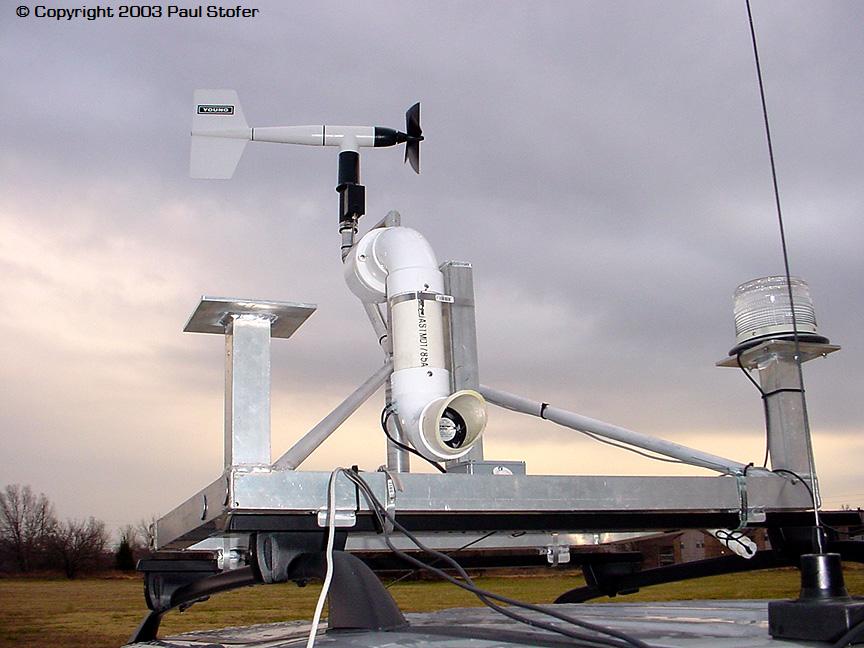
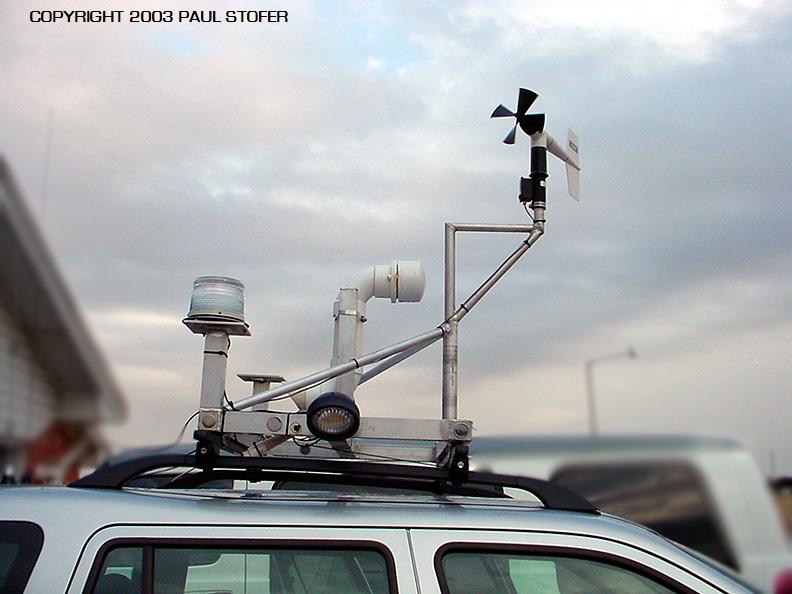
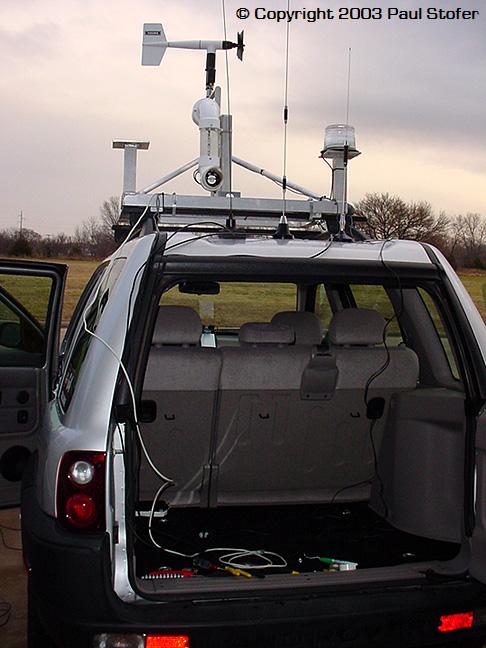
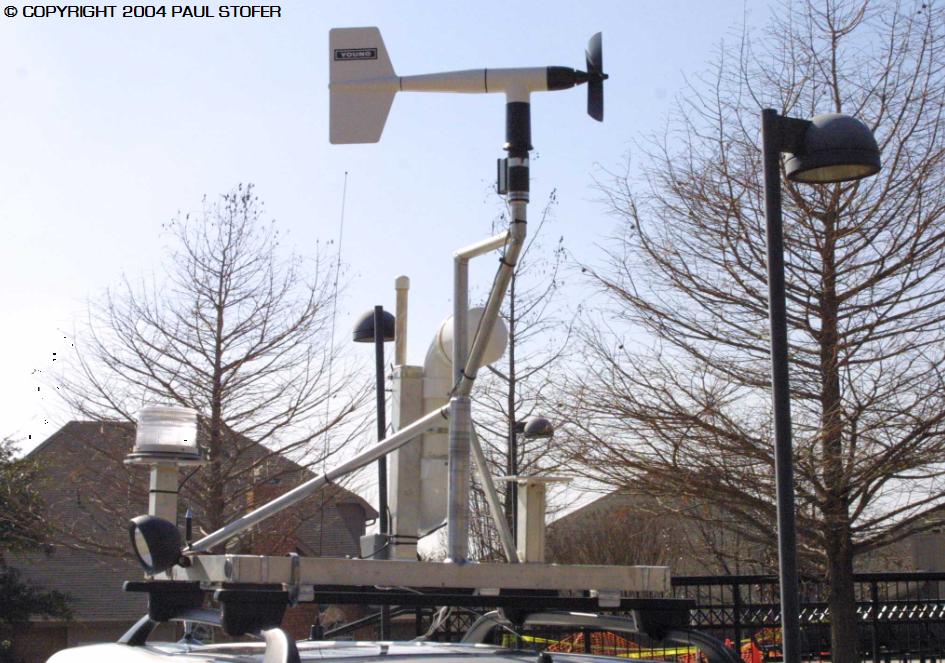
. Weather Station Project
This
project included the help from fellow chaser and friend Eric
Nguyen. Thanks for the help Eric!
On the inside of the vehicle there is:
Click Here to view my previous chase vehicle from the 2001-2003 Chase Seasons 2. Lift Kit Installation The lift kit I purchased for this modification was from DAP Enterprises. This lift only lifted my Rover and additional 2 inches but it allows a ton more room underneath the vehicle. The clearance is so much higher now, and with larger tires the clearance will be even better!
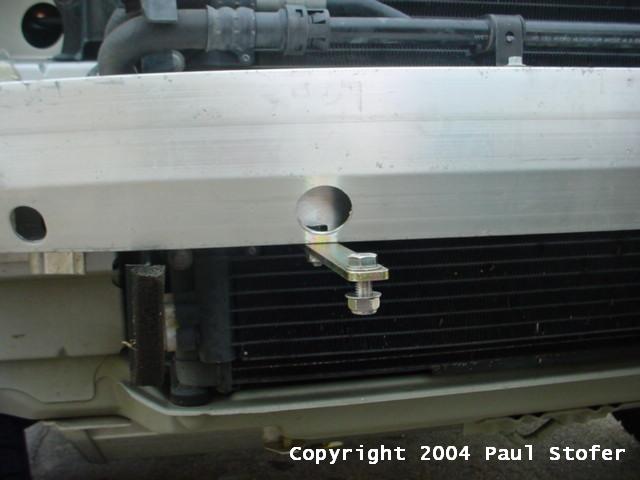
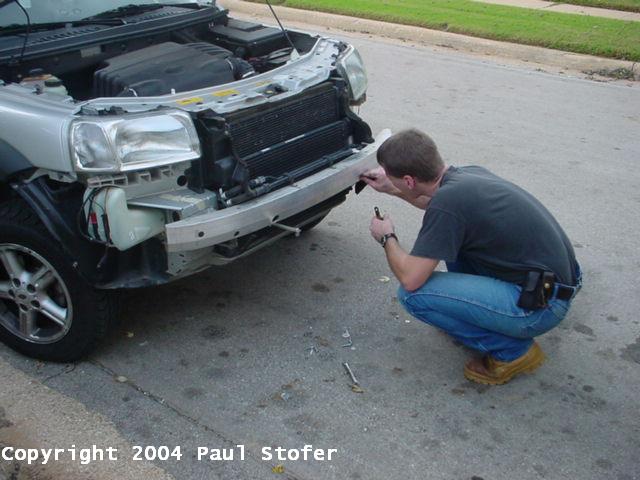
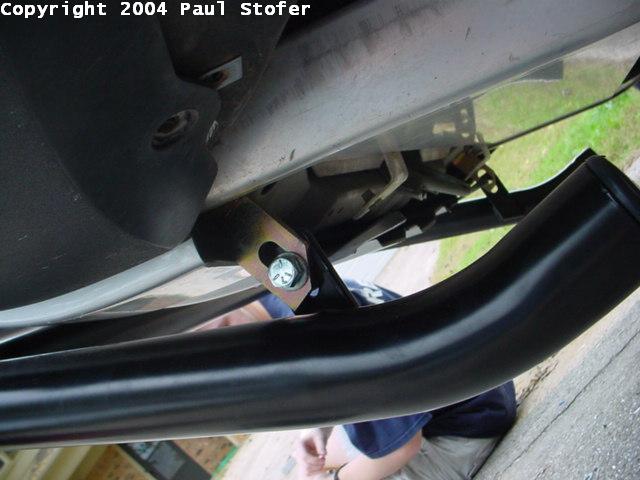
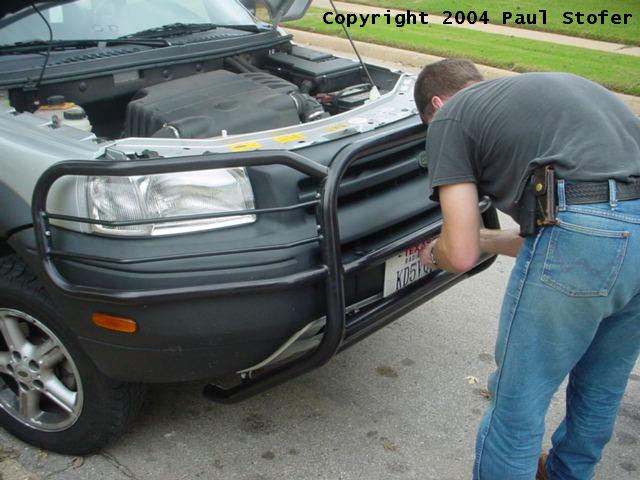
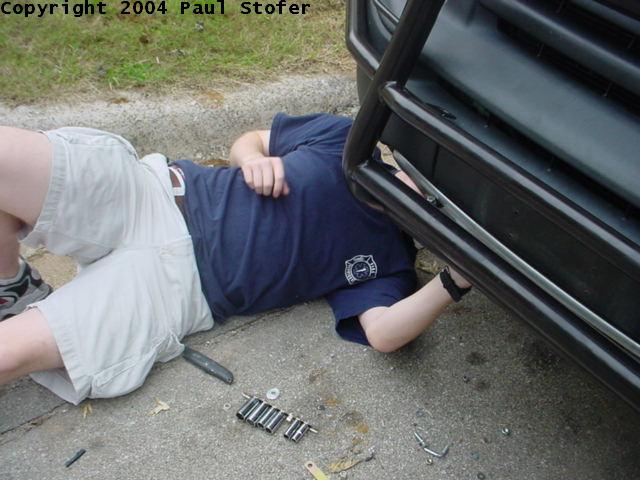
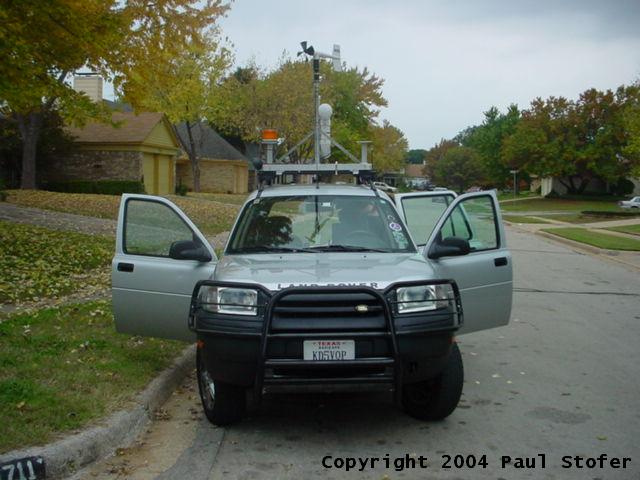
3. Front and Rear Brush Guard Installation This project included the help from friend Jay Urish... The brush guards that I bought for this modification were from DAP Enterprises. These cover both the front and the rear lamps. They will protect them while both off-roading and storm chasing. They are definitely a great looking addition to the Freelander! The installation of the rear brush guards was simple and I installed them myself. The front brush guards were a little more difficult. In order to install the front brush guards we had to remove the front bumper. After the removal of the bumper we had some trouble getting the new bolts in place so we drilled a hole into the aluminum front of the bumper to allow easier access. Once the metal slates were bolted to the frame we placed the bumper back onto the car and bolted the brush guards to the slates. Then we bolted below the vehicle to the supports we installed. The directions for installation were less than helpful and were very incorrect in some spots. Below are some pictures of the newly installed brush guards!
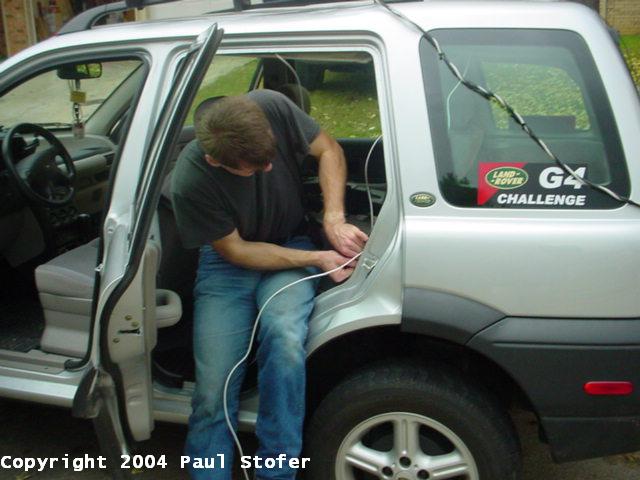
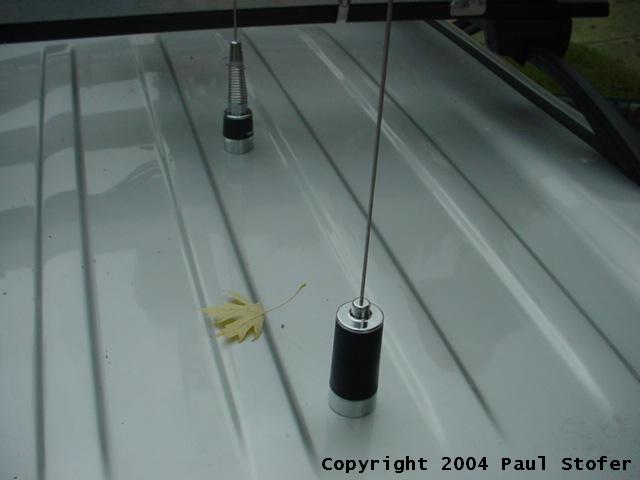
4. Radio Equipment Installation The equipment installed for the radio communications was a Icom dual band 2720H. A 144Mhz / 440Mhz dual band MAXRAD NMO antenna was also used. This antenna will operate 2 frequency bands at the same time which will allow me to control amateur radio communications on 2 meter and 70 centimeter as well as police and fire frequencies, TV reception, aircraft communications and NOAA Weather Radio reception all at the same time. To install this we drilled two holes into the roof of the Rover and placed 2 NMO mounts. One of the mounts which used to be a CB antenna is now used for a junction box to run the wires in from the weather station which can be seen in the third picture bottom middle, and the other hole is used for the dual band radio antenna. We then dropped the roof and ran cables down the inside of the sidewalls so the radio and power cables would not be able to be seen. The coax was then run to the radio equipment and now I have perfect reception! The Icom remote display is on the dash, which is seen in the top middle of the fifth picture above the clock, and the transceiver itself is bolted underneath the driver seat. All the wiring for the weather station is tucked into a 3rd junction box underneath the passenger seat which can be seen in the fourth picture.
5. Hella 500 Fog Lamp Installation This project included the help from friend Jay Urish. Installed today was the Hella 500 pencil beam fog lamp system. We wired the switch to a factory spot in the dash. The lights were then mounted on the DAP wrap around brush bar.
|